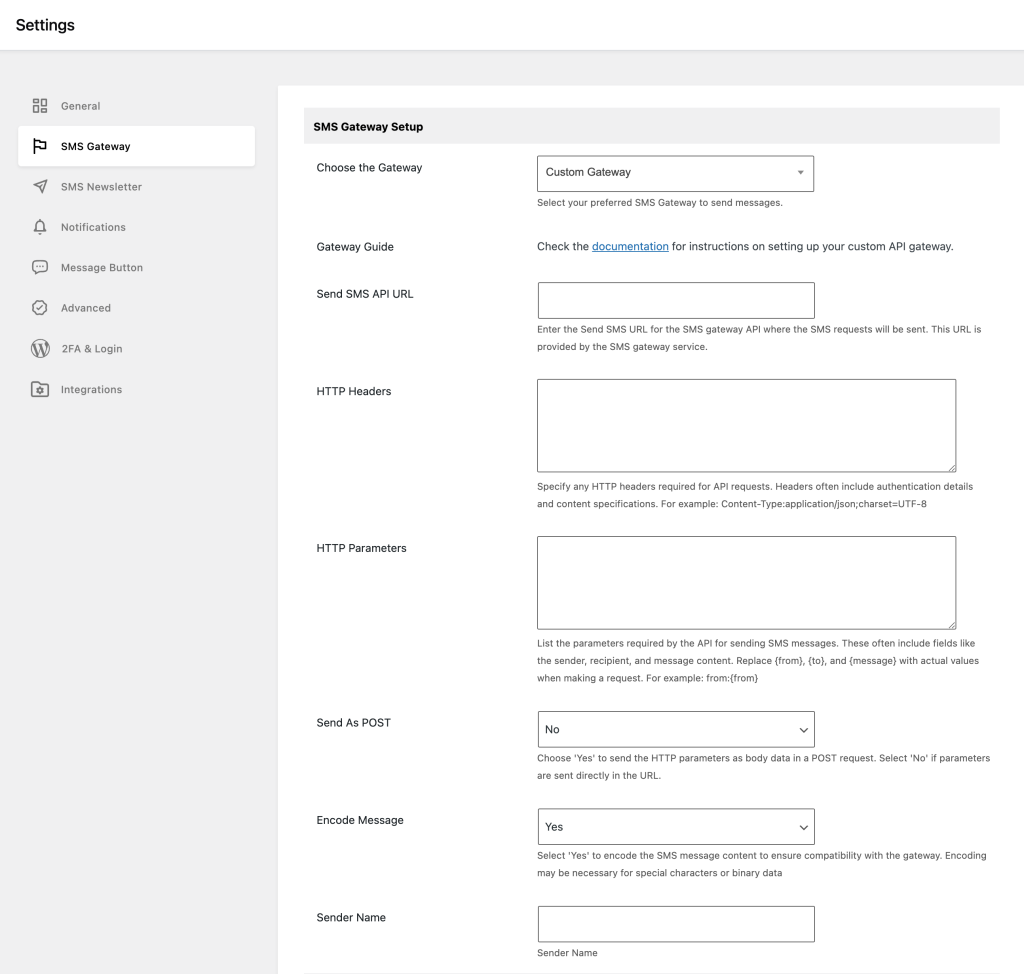
This guide provides step-by-step instructions on how to configure a custom SMS gateway in your WordPress site using the WP SMS plugin. This is useful for integrating SMS services that are not natively supported by the plugin, allowing for greater flexibility and customization.
1. Custom Gateway Configuration
- Choose the Gateway: Select ‘Custom Gateway‘ from the dropdown menu to enable manual configuration of your SMS gateway.
- Send SMS API URL: Input the API endpoint URL provided by your custom SMS service. This is the server address where SMS requests will be sent.
2. HTTP Settings for Custom Gateway
- HTTP Headers: Add the necessary headers for your API requests. These headers might include content type specifications and any required authentication tokens. For example:
Content-Type: application/json;charset=UTF-8X-Header: Test
- HTTP Parameters: List the parameters your API expects in requests. Typically, these parameters include the sender, recipient, and message content. Format your parameters as key-value pairs like so:
from:{from}to:{to}message:{message}
- Send As POST: Enable this option if your API requires parameters to be sent in the body of a POST request. If disabled, parameters will be appended to the URL.
- Encode Message: Toggle this option to encode the SMS content, ensuring compatibility with different network carriers and devices.