Overview
WP SMS Two-Way is an Add-On for WP SMS that allows you to receive and enable incoming messages on your website’s inbox page. This can be useful for businesses or organizations that want to be able to communicate with their customers or clients through SMS. It can also be helpful for personal blog or website owners who want to be able to easily receive and respond to text messages from their visitors. With this plugin, users can manage their SMS communications directly from their WordPress dashboard, making it easy to stay organized and responsive to messages.
This Add-on provides you:
- The ability to Receive incoming messages
- Create dynamic commands for automatic responses to these messages
Requirements
Add-On requires the following from your host:
- PHP version 7.4 or greater.
- MySQL version 5.7 or greater OR MariaDB version 10.2 or higher.
- PHP Intl extension.
Installation
1. Make sure the below plugins are installed in advance:
- WP SMS
- WooCommerce (optional)
2. Install WP SMS Two Way
- Go to Plugins → Add New and upload wp-sms-two-way.zip
- Click Install Now and then Activate.
- Activate the plugin through the Plugins menu in WordPress
- Enter your license key on SMS → Settings → Licenses to enable automatic updates
Activate the license through wp-config.php
You can also activate your license key through wp-config.php by adding this code:define('WP_SMS_TWO_WAY_LICENSE', 'your-license-key');
Notice for Database Connections
If your database uses a port other than the default (3306), please specify it in the DB_HOST configuration within your wp-config.php file. For example:define( 'DB_HOST', 'localhost:10016' );
Configuration
Connect your SMS Gateway to WP SMS Two Way:
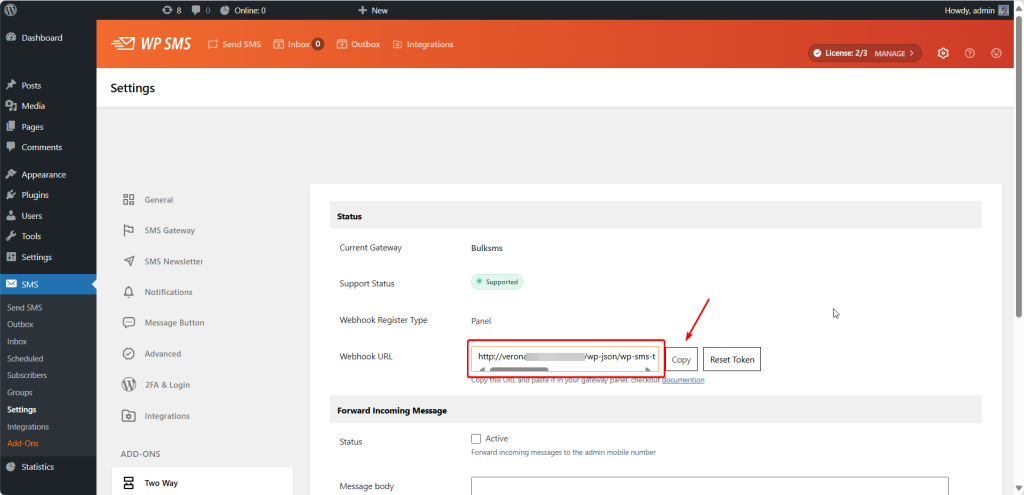
Go to SMS → Settings → Two Way and copy the generated webhook URL.
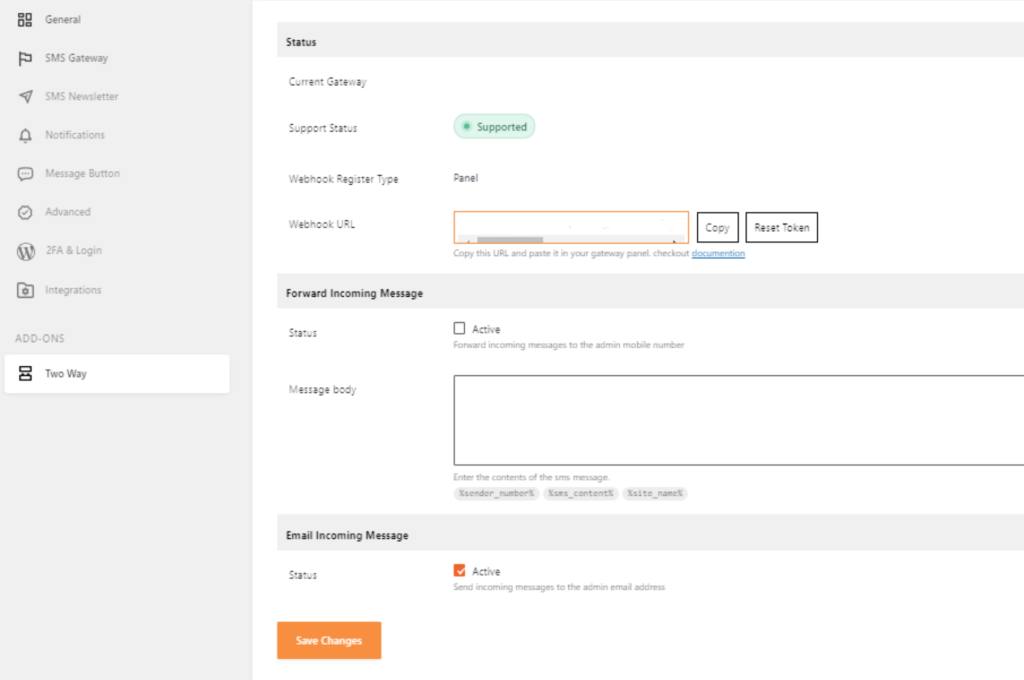
Then you need to paste this Webhook URL on the SMS gateway.
For Twilio:
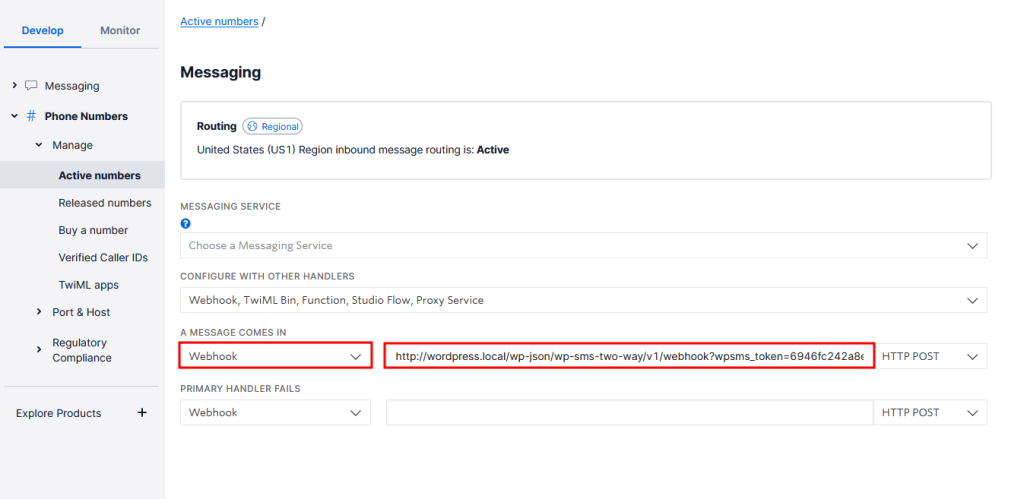
Log in to Twilio Console → Phone Numbers → Active Numbers and Click on your number, then paste the Webhook URL on the Webhook field.
For Plivo:
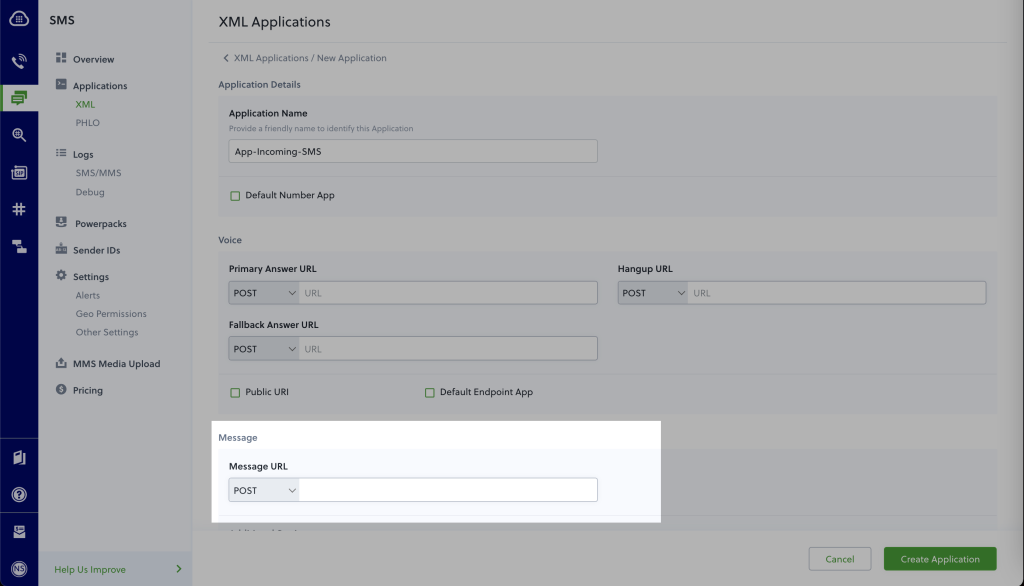
Go to the Plivo console and navigate to Messaging → Applications → XML, then click on the Add New Application button in the upper right.
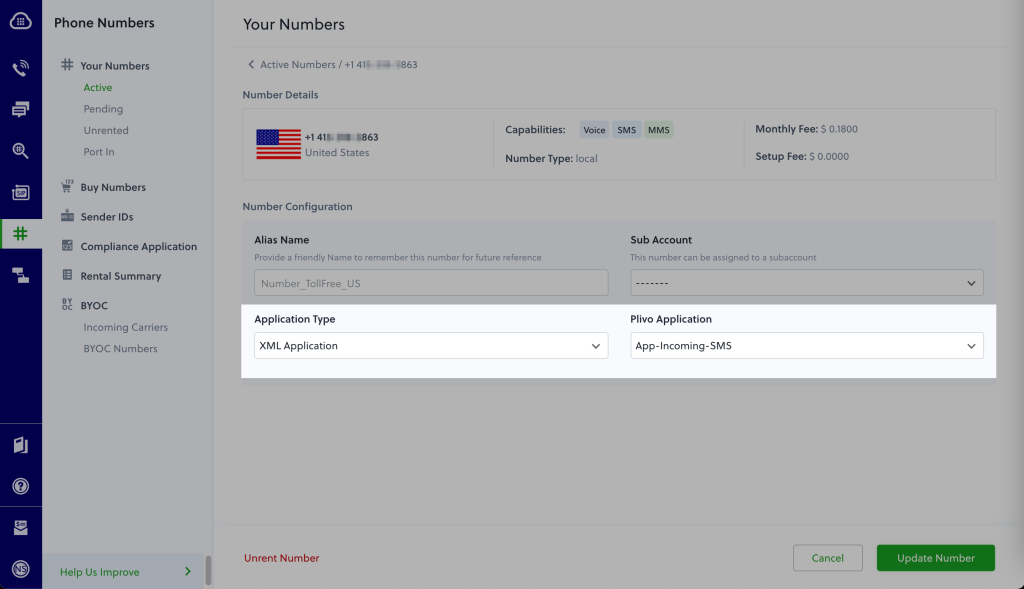
Now go to Phone Numbers → Your Numbers and click on the number to which you want to assign the application. From the Plivo Application drop-down, choose the message application you just created. Finally, click Update Number.
For Vonage:
Check out this article
For ASPSMS:
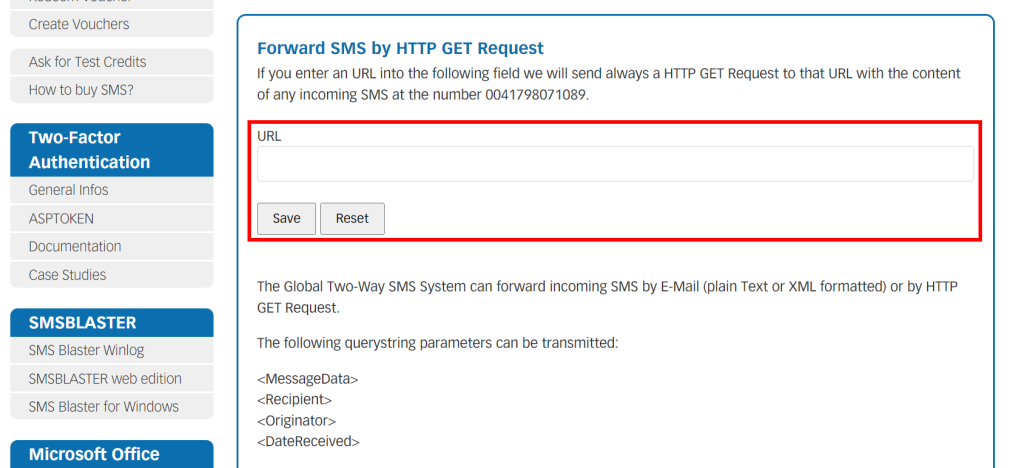
Log in to ASPSMS console → Two-Way SMS → My Mobile Numbers and Click to edit your number, then scroll down to Forward SMS by HTTP GET Request part. Finally, paste the URL in the URL box and click Save.
For BulkGate:
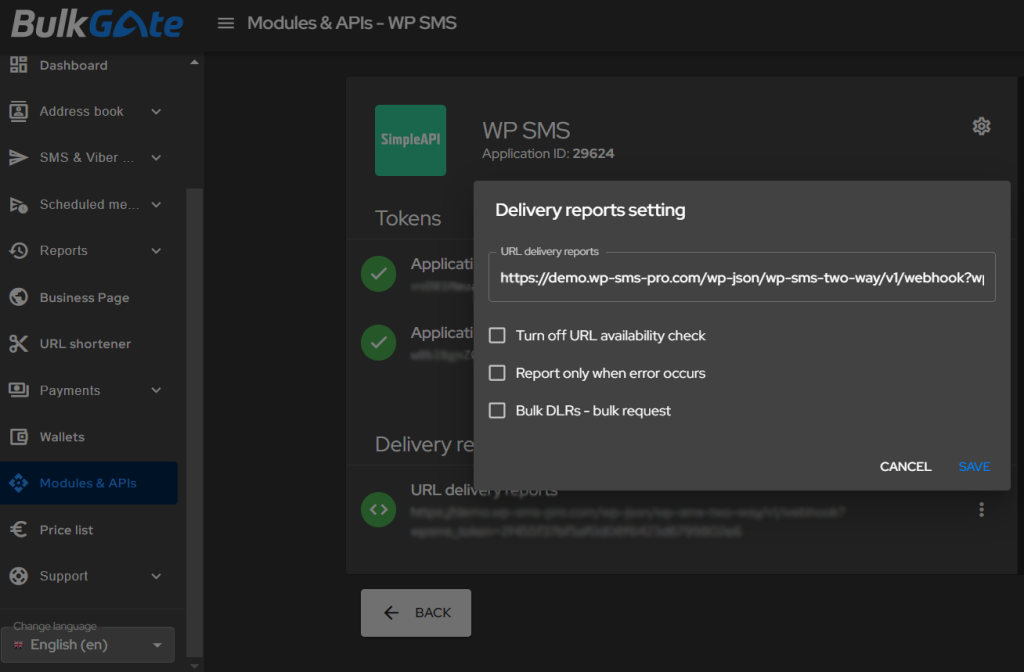
Log in to BulkGate → Modules & APIs and select your API, then on the Delivery reports section, click edit, paste the URL in the URL box, and click Save.
For Cellsynt:
Login to your panel on Cellsynt → Incoming SMS → Settings. Paste the URL in the URL for HTTP-request box and click Save Changes.

For Telnyx:
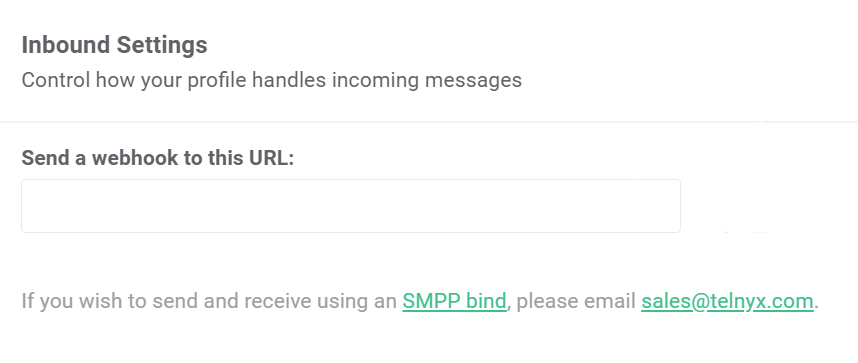
In order to receive SMS on your Telnyx purchased number, you need to attach a webhook to the number’s respective messaging profile.
To activate the WP SMS in Telnyx, you go to Dashboard → Messaging → Programmable Messaging → Messaging Profiles. You create a new profile for incoming messages and Then paste the webhook URL in the Inbound Settings and click Save Changes.
For AfricasTalking:
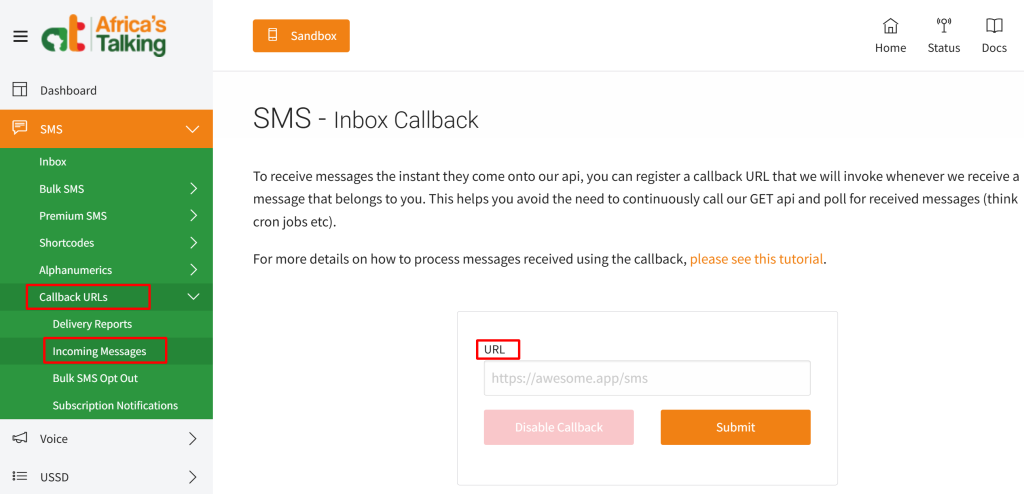
Log in to your Africastalking account and navigate to the dashboard. To receive incoming messages, you need to set an incoming messages callback URL. From the dashboard select SMS → SMS Callback URLs → Incoming Messages. you will see a field labeled URL, Enter the URL. This is the Webhook URL that Africastalking will use to send incoming message notifications. Click the Submit button to update the settings.
For Octopush:
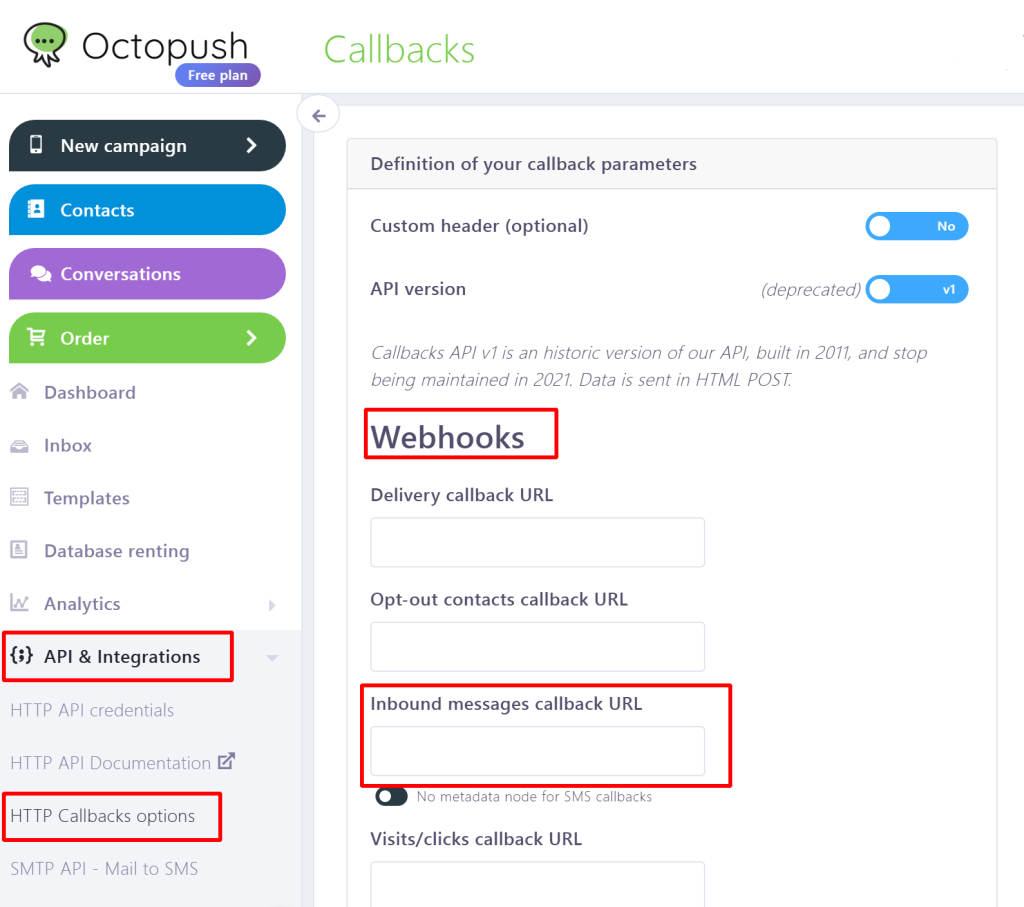
Log in to your Octopush account and navigate to the API & Integrations → HTTP callback options → Webhooks → Inbound messages callback URL and enter the URL. This is the Webhook URL that Octopush will use to send incoming message notifications. Click the Save my callback parameters button to update the settings.
For Infobip:
To configure webhook settings for receiving SMS messages, please contact Infobip gateway support.
For SMSAPI:
The callback address received from the plugin should be entered here as the Callback URL with the Type selected as “Callback address SMS receive”.
For 160.com.au
Please click here for more information.
For BulkSMS
1. Navigate to SMS > Settings > Two Way in your WordPress admin area and copy the Webhook URL.
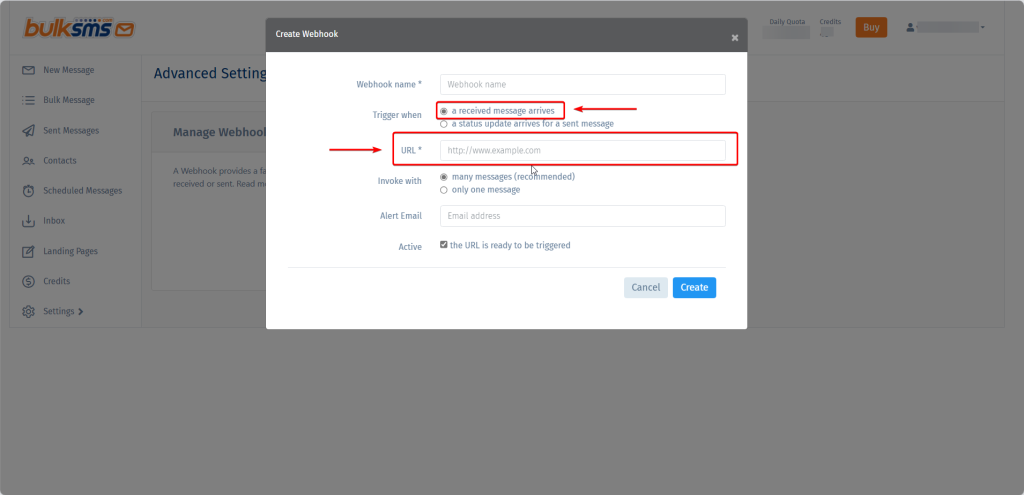
2. Next, go to your BulkSMS dashboard, and then to Settings > Advanced > Webhooks: https://www.bulksms.com/account/#!/advanced-settings/webhooks.
3. Create a new webhook and paste the Webhook URL from your SMS settings into the URL field.
For Mobile Message (Australia)
1. Navigate to SMS > Settings > Two Way in your WordPress admin area and copy the Webhook URL.
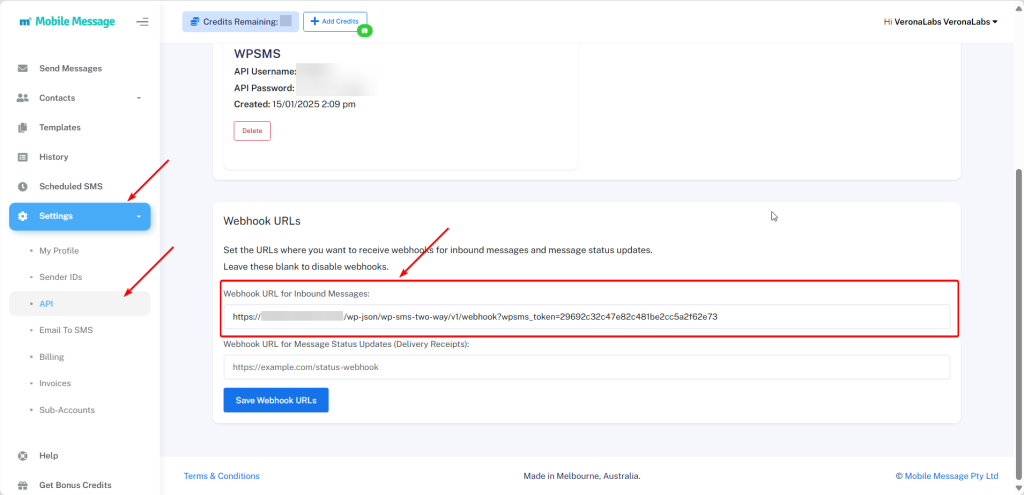
2. Next, go to your Mobile Message dashboard, and then to Settings > API > Webhook URLs: https://app.mobilemessage.com.au/api.
3. Paste the Webhook URL from your SMS settings into the “Webhook URL for Inbound Messages” field.
Debugging the Incoming Messages Webhook
To make sure the gateway is calling the webhook, you can check logs in /wp-content/uploads/wp-sms-two-way-logs/incoming_requests
That’s it! You’re now ready to receive and respond to incoming SMS messages on your WordPress site. With the WP SMS Two Way plugin, you can manage all of your SMS communications directly from your dashboard, making it easy to stay organized and responsive to messages. Whether you’re running a business or personal blog, the WP SMS Two-Way plugin can help you enhance your SMS functionality and improve communication with your visitors.
